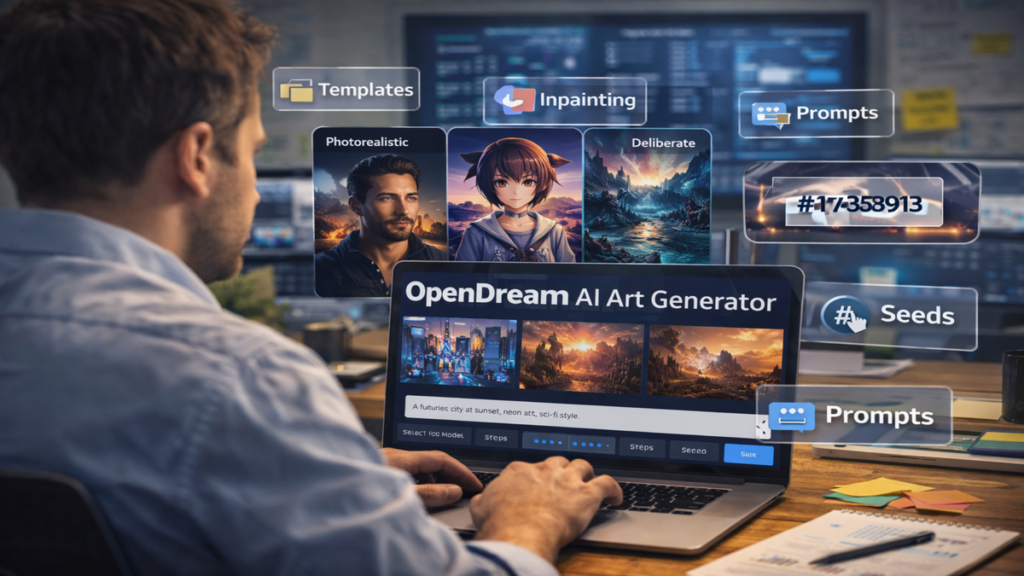
I first ran into opendream ai art while looking for a simple way to turn written ideas into visuals that still felt polished enough for real projects. What stood out to me was not just that it generated images from text, but that it tried to make the process approachable: pick a style model, tweak a few controls, reuse a seed for consistency, and iterate fast. In plain terms, OpenDream is an AI art generator that uses Stable Diffusion style models to transform prompts into images, offering a web based workflow that can fit casual experimenting and serious production alike.
This guide explains what OpenDream AI art is, how the key models and features work, and how to get better results through prompt structure, templates, seeds, and editing tools like inpainting. I focus on practical steps and decision making so you can move from random outputs to repeatable visuals.
What OpenDream AI Art Means in Everyday Use
OpenDream AI art refers to the images created inside OpenDream’s platform by typing a prompt and selecting generation settings. A prompt is simply a detailed description of what you want, and the system interprets it using diffusion models that generate an image from noise, gradually shaping it into something that matches the text.
What makes this useful is not the novelty of AI images, since many tools do that, but the ability to steer outcomes: you can choose a model suited to your intended style, set a consistent aspect ratio for your channel, reuse a seed for reproducible variations, and refine with steps and guidance until it lands where you want.
Who Typically Uses OpenDream
OpenDream tends to appeal to people who need visuals quickly without building a full design pipeline from scratch. That includes:
- Designers who need concept drafts, mood boards, or quick iterations
- Marketers building ad creatives, thumbnails, or social graphics
- Game developers exploring character concepts, environments, and props
- Hobbyists creating anime portraits, posters, wallpapers, and experiments
The common theme is speed plus flexibility. You can generate, compare, refine, and download in a short cycle.
How Text to Image Generation Works
OpenDream’s output quality depends on how you combine three things: the prompt, the model, and the settings. If you keep those consistent, you get consistent results. If you change them randomly, outputs swing widely.
At a high level, the system:
- Reads your prompt and any negative prompt
- Uses a selected model to interpret style and content patterns
- Runs a diffusion process for a chosen number of steps
- Applies guidance so the image follows the prompt rather than drifting
- Produces one or more images, often with variation
Why Your Prompt Matters More Than People Expect
A prompt is not just “what you want,” it is also your composition plan. If you do not specify camera angle, lighting, subject, environment, and mood, the model fills gaps with guesses. Sometimes those guesses look great. Other times they look generic. Clear prompts reduce guesswork.
OpenDream Models and What They Are Best At
OpenDream commonly highlights several models that cover different artistic directions. You can treat them as style engines. Some emphasize realism, some push anime aesthetics, and others aim for flexible creativity.
Model Selection Cheat Sheet
| Model | Best For | Typical Look | When I Choose It |
|---|---|---|---|
| Dreamlike Photoreal 2.0 | Realistic portraits, product style scenes, lifelike environments | Clean lighting, camera realism | When I want believable photos or brand style realism |
| Anime 1.0 | Anime faces, stylized characters, vibrant illustration | Sharp lines, big expressive eyes, vivid shading | When I want character art or manga inspired visuals |
| Stable Diffusion 2.1 | Balanced general purpose generation | Flexible, sometimes neutral | When I need a baseline or broad experimentation |
| Deliberate | Cinematic, concept art, creative blends | Dramatic composition, artistic polish | When I want poster like visuals or bold art direction |
A simple rule helps: if the result feels “almost right but off style,” change the model first before you over tweak settings.
Core Features That Define OpenDream AI Art
OpenDream’s usefulness is not just the models. It is the features that make your outputs easier to control and repeat.
Templates That Speed Up Results
Templates are starting points that usually pre set style choices, aspect ratios, and sometimes prompt structure. If you create content for a consistent format, templates save time and reduce inconsistency.
Common use cases include:
- Social media posts and thumbnails
- Concept art panels
- Print mockups and poster layouts
- Character portrait formats
A good workflow is to start with a template, generate a batch, then save the best prompt and settings as your own repeatable preset.
Seeds for Reproducibility
A seed is like a starting “randomness code.” If you reuse the same prompt, model, and seed, you can often reproduce very similar results. If you keep the seed but adjust one small prompt detail, you usually get controlled variations rather than a totally new scene.
This is extremely useful for:
- Keeping a character consistent across multiple images
- Creating brand consistent visual campaigns
- Iterating composition while preserving style
Steps and Guidance for Refinement
Two settings shape output quality and prompt adherence.
- Steps: More steps often means more detail, but also slower generation. Too many steps can over sharpen or introduce artifacts in some cases.
- Guidance scale: Higher guidance usually forces the image to follow your prompt more strictly, but can reduce natural realism if pushed too high.
Practical Settings Table
| Goal | Steps Range | Guidance Approach | What to Watch For |
|---|---|---|---|
| Fast ideation | 20 to 30 | Medium | Good for rough drafts and composition hunting |
| Balanced quality | 30 to 45 | Medium to moderately high | Best for most use cases |
| Detail push | 45 to 60 | Moderately high | Can introduce unnatural textures if overdone |
| Natural realism | 25 to 45 | Medium | Too high guidance can look “over directed” |
You do not need extreme values for most work. Consistency matters more than chasing maximum settings.
Using Inpainting to Fix Specific Areas
Inpainting is one of the most practical tools in AI art workflows. Instead of regenerating the whole image, you select a region and tell the model what to change. This is how people fix hands, remove strange objects, adjust faces, or add elements without losing the whole composition.
A simple inpainting workflow looks like this:
- Generate an image close to what you want
- Open the inpainting tool
- Mask only the area you want changed
- Write a focused prompt for the masked area
- Regenerate until it matches the scene
What Inpainting Works Best For
Inpainting is strongest for local edits:
- Correcting facial features
- Cleaning up background clutter
- Adjusting clothing details
- Removing text like artifacts or watermarks
- Fixing extra fingers or distorted objects
If the entire scene is wrong, re prompt and regenerate. If 80 percent is right and one part is off, inpainting saves time.
Prompt Engineering That Produces Cleaner Outputs
Prompting does not need to be complicated, but it benefits from structure. I use a simple formula that keeps outputs consistent across models.
A Repeatable Prompt Structure
Use this order:
- Subject: who or what is the main focus
- Context: where it is, what is happening
- Composition: camera angle, framing, distance
- Lighting: soft, dramatic, golden hour, studio
- Style: photoreal, anime, cinematic, illustration
- Quality tags: detailed, high resolution, sharp focus
Prompt Template Table
| Prompt Part | Example Text You Can Reuse |
|---|---|
| Subject | “a minimal modern workspace with a laptop and charts” |
| Context | “startup team planning growth strategy in a bright office” |
| Composition | “wide angle, eye level, shallow depth of field” |
| Lighting | “soft natural window light, clean shadows” |
| Style | “photorealistic, cinematic color grading” |
| Quality | “high detail, crisp focus, professional photography” |
This keeps your prompt readable and makes it easier to edit without breaking everything.
Negative Prompts for Cleaner Images
Negative prompts tell the model what to avoid. They are especially useful for preventing common generation issues.
Common negative prompt ideas:
- “text, watermark, logo”
- “extra limbs, extra fingers, deformed hands”
- “blurry, low quality, jpeg artifacts”
- “distorted face, asymmetrical eyes”
You do not need to overstuff negative prompts. Use a short list that matches your problem.
Step by Step Guide to Creating OpenDream AI Art
This section turns the platform into a repeatable routine, especially for beginners.
Set Up Your First Project
- Open the web interface and create an account
- Start a new project or select a template
- Pick a model that matches your intended style
- Choose aspect ratio based on where the image will be used
Write a Prompt That Includes Visual Direction
Instead of “a mountain at dawn,” write:
- “a misty mountain landscape at dawn, soft pastel sky, wide angle view, atmospheric haze, cinematic lighting, high detail”
That difference is the difference between a generic wallpaper and a purposeful image.
Generate, Review, and Iterate
Generate the first set, then ask:
- Is the subject clear?
- Is the style correct?
- Is the lighting consistent?
- Is the framing right for the platform?
If the subject is wrong, rewrite the subject portion. If the style is wrong, change the model. If the output is close but messy in one area, use inpainting.
Using OpenDream for Real Projects
The best way to understand pluggable AI art is to attach it to a real goal. Different users need different workflows.
Designers and Brand Teams
Designers often want consistency more than novelty. A strong approach is:
- Lock aspect ratio
- Lock model
- Keep a small seed library for brand visuals
- Build a prompt library with approved phrases
This makes output look like a family rather than random experiments.
Marketers and Social Media Creators
Speed matters here. A practical loop:
- Use templates for social sizing
- Generate 4 variants per concept
- Pick the best composition
- Inpaint to fix details
- Add final typography in a design tool
This avoids fighting the AI to generate perfect text in image, which is usually unreliable.
Game Developers and World Builders
Game concepts benefit from breadth first exploration:
- Generate multiple environment variants
- Save seeds that feel like the world’s visual identity
- Use inpainting to adjust props and landmarks
- Create a style bible using consistent prompts and outputs
Pricing, Free Tier, and Commercial Use Considerations
OpenDream typically offers a free tier and paid plans. The free tier often focuses on basic access and slower generation, while paid plans increase speed, allow more simultaneous generations, and can include commercial rights.
When deciding whether the paid tier is worth it, I would look at:
- How often you need to generate batches
- Whether you need commercial usage rights
- Whether faster iteration saves meaningful time
- Whether you rely on specific models not included in free access
Practical Decision Table
| Your Situation | Free Tier Works If | Paid Plan Helps If |
|---|---|---|
| Casual learning | You generate occasionally | You want faster experimentation |
| Content creation | You only need a few images | You need batches for campaigns |
| Client work | You are testing ideas | You need clear commercial rights |
| Team workflow | Solo personal use | Shared production and repeatability |
Quality Control and Post Processing
AI generation is often the middle of the pipeline, not the end. Many creators do light post processing for professional results.
Common post steps include:
- Minor color correction and contrast tuning
- Hand fixes or facial cleanup with inpainting first, then touch up
- Upscaling if needed for print or large formats
- Adding brand elements in a separate editor
If your goal is consistency, treat AI as the concept and base image step, then finish with standard design tools.
Common Problems and How to Fix Them
The Image Looks Good but the Face Is Off
Fix approach:
- Inpaint only the face region
- Add prompt detail: “symmetrical face, natural expression, realistic eyes”
- Reduce overly aggressive guidance if it causes strange stiffness
The Hands Are Distorted
Fix approach:
- Use negative prompts related to hands
- Generate a few variants first since hands are stochastic
- Inpaint hands separately once the composition is locked
The Output Has Random Text or Symbols
Fix approach:
- Use negative prompt: “text, watermark, logo”
- Inpaint the area with a simple replacement like “plain fabric texture” or “clean wall”
The Style Is Not Matching Your Intent
Fix approach:
- Switch model before changing everything else
- Add style anchors: “photorealistic studio photo” or “anime cel shading”
- Remove conflicting style words that pull in multiple directions
Best Practices for Repeatable OpenDream AI Art
Consistency comes from discipline more than luck.
Build a Small Library
Save:
- 10 to 20 best prompts
- A handful of proven seeds
- Settings that match your common outputs
- A negative prompt set that fits your style
Over time, you stop starting from zero. You start from a proven base.
Change One Variable at a Time
If you change the model, prompt, steps, guidance, and seed all at once, you cannot tell what caused improvement or failure. Change one thing, compare, then adjust again.
Final Thoughts on OpenDream AI Art
I see opendream ai art as a practical gateway to modern text to image creation, especially for people who want fast results without managing complex local installs. The real skill is not typing random prompts. The real skill is building a repeatable workflow: choose the right model, structure the prompt, lock seeds when consistency matters, and use tools like inpainting to refine instead of restarting.
If you treat the process like a craft, OpenDream becomes more than a generator. It becomes a visual iteration machine that can support real design, marketing, and creative production.
Click Here For More Blog Posts!
FAQs
Is OpenDream AI art suitable for beginners with no design background
Yes, because templates, model selection, and a simple prompt workflow can help beginners create usable visuals quickly without advanced tools.
Which OpenDream model should I pick for realistic images
Dreamlike Photoreal 2.0 is typically the best starting point when your goal is lifelike portraits, products, or realistic scenes.
How do seeds help with consistent characters or branding
Seeds make outputs more reproducible. When you reuse the same seed with similar prompts and settings, you get controlled variations.
What should I do if the image is almost perfect but one area is wrong
Use inpainting. Mask only the problem area and prompt the fix so you do not lose the rest of the composition.
Can I use OpenDream images for business or client projects
It depends on your plan and rights. If you need commercial usage, choose a tier that clearly provides it.